
Table of Contents
Introduction
Still losing your keys? Or maybe your backpack decided to go on vacation without you? The Life Tag, a sleek tracking device, is here to save the day! And the best part? It integrates seamlessly with Apple’s Find My app.
Developed exclusively for Apple users, LifeMate uses the powerful Find My network, which means you can track your items right from the app you already use for your Apple devices. In this guide, we’ll walk you through the step-by-step process to set up your Life Tag quickly.
Step 1: Unboxing and Preparing Your Life Tag
Let’s start with the basics! In the LifeMate package, you’ll find:
- The Life Tag tracking device
- A quick start guide
- A keychain or adhesive mount (depending on the model)
Before starting the setup, make sure your iPhone or iPad is updated to iOS 14.5 or later, as earlier versions do not support third-party devices in the Find My network.
What you need:
- Your LifeMate (tracking device)
- An iPhone or iPad connected to your Apple ID
- Bluetooth enabled on your iPhone
Step 2: Activating Your LifeMate
-
Power on your LifeMate
- If your Life Tag has a button, press and hold it until the LED indicator blinks. This means the tracker is in pairing mode.
- For models without a button, simply remove the protective sticker to activate the battery.
-
Keep it near your iPhone
- Ensure the LifeMate is within a few centimeters of your iPhone.
-
Open the Find My app
- Launch the Find My app on your iPhone.
- Tap the Items tab at the bottom of the screen.
-
Add a new item
- Tap Add Item > Other Supported Item (for third-party devices).
- Follow the on-screen instructions to link your LifeMate to your Apple ID.
Once pairing is complete, you’ll be prompted to name your LifeMate (e.g., “Keys,” “Wallet,” “Backpack”). It’s now officially linked to your Find My account!
Step 3: Attaching the Life Tag to Your Items
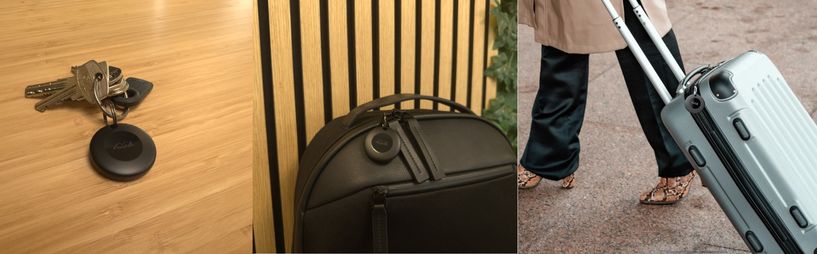
Depending on the item you want to track, attach your Life Tag as follows:
- Keys or bags: Use the keychain to secure it.
- Laptops or remotes: Use the adhesive mount to stick it on flat surfaces.
- Pet collars: Thread the keychain through your pet’s collar for walks.
Step 4: Locating Your Items with the Find My App
Once your LifeMate is set up, you can easily locate it using Apple’s Find My app. Here’s how:
- Open the Find My app.
- Tap the Items tab.
- Select your LifeMate from the list.
Features you’ll love:
- Precision tracking: View your item’s location on the map in real time.
- Play sound: Tap Play Sound to make your LifeMate emit a loud sound when nearby.
- Lost Mode: Enable Lost Mode to get notified when another Apple device user comes near and updates its location.
- Directions: Get turn-by-turn directions to your item via Apple Maps.
Step 5: Resetting Your LifeMate Tag
Press the button 5 times on your LifeMate and hold it after the 5th press until you hear a long beep.
Step 6: Customizing the Settings of Your LifeMate
You can adjust some settings to make your LifeMate even more useful:
- Rename device: Change the name of your LifeTag in the app to better reflect what you’re tracking (e.g., “Camera Gear”).
- Remove device: If you sell or give away your LifeMate, you can unlink it from your Apple ID in the Find My app.
- Low battery alerts: Receive notifications when your LifeTag needs a battery replacement.
Frequently Asked Questions
- Does the Life Tag work with Android devices? No, it’s only compatible with Apple’s Find My network and cannot be used with Android.
- Can I track multiple Life Tags with one iPhone? Yes, you can add multiple LifeMate devices to your Find My app and manage them all under the Items tab.
- Is the Life Tag waterproof? Most models are water-resistant, but not fully waterproof. Avoid submerging them and refer to your device’s manual.